Tuesday, April 10, 2012

On Cooking for Kids - Homemade Gummies

Recently, I've been in search of kid friendly snack options to get me out of the rut I've found myself in when it comes to our munching habits. In searching for goodie recipes, I came across super simple homemade gummies. I was excited until I saw that the majority of recipes called for Jell-o and gelatin. While this may not sound so bad, I was really thinking that if you are going to make it yourself, you may as well make something that's not going to contain artificially flavored and colored snacks (as good as they are). If that's the case, you might as well just buy the commercially made fruit snacks. They at least have fruit juice in some of them. I continued my search seeing if I could find a "healthy" option and came up short. I found a few that used some fruit juice which was nice, but I was hoping to find a whole fruit option, but no one seemed to offer this option, at least not that I could find. That meant I'd just have to figure it out myself. So I did. It only took three tries to get it right! Now I'm excited about new flavor possibilities, but the first successful batch was made with strawberries. And because I was asked by several people for a recipe, here it is:

Homemade Strawberry Gummies
(by Beth Endsley)

Ingredients:
1 lb hulled strawberries (I used fresh strawberries that I hulled and froze and then defrosted for this recipe)
1/4 c agave nectar
1 oz (4 packets) gelatin

Directions:
1. Liquefy strawberries in blender. Heat strawberry liquid in small pot on stove until boiling. Reduce heat to a simmer and let simmer for 25-30 minutes to reduce to about half.
2. Remove from heat and stir in agave nectar. Let cool to room temperature.
3. Add gelatin to cooled mixture and stir in to mix. Slowly heat mixture, stirring constantly until gelatin melts and mixture is smooth. Remove from heat.
4. Pour into candy molds. Cool in refrigerator for about an hour or until firm.
5. Enjoy!

A few more notes:

The final mixure makes about 1 1/4 cups of gummy mix. The number of gummies will vary based on the size and shape of your candy molds. Alternately, you can pour the mixture into a larger pan and cut into squares when cool. Lightly greasing your candy molds or pan may help the mixture release from the molds when set, but this may not be necessary. I found that transferring the mix to a measuring cup with a spout  made pouring it into the molds much easier to control.


I ran out of molds so the remaining mix
was poured into a loaf pan for square gummies.
I hope you enjoy this yummy healthy snack! Please let me know if you try it and how it works out for you!

Thursday, April 5, 2012

On Busy Bags

Busy bags are a fairly new concept to me. If you don't know what they are, I'll explain. Busy bags are bags (like a quart sized plastic storage bag or similar) that contain materials for a small activity that can keep children occupied. The activity is ideally geared toward the child's developmental age. Busy bag activities can be fun, educational, stimulating, or all of the above. Many people make activity bags for their children, but there are groups that get together to trade these bags as well. Groups can be any number of sizes and the idea is that each individual puts together a single bag for every person in the group including themselves. (spending a modest previously agreed upon amount per bag). After a trade meet-up, you leave with one of each activity for your child. Busy bags can be pulled out in any situation where you need to calm your child and focus their attention be it when you are bored with nothing else to do at home or if you are out and about and you children may be stuck waiting and potentially getting bored and acting out.

When I was first approached about joining a busy bag group from a mom I know, I was a little bit hesitant. I was concerned for several reasons. The main one was that I felt I didn't need any cheap little toys to add to the clutter in my house. I figured they could be good at occupying a child, but when they get bored, you just have more to add to the mess. Also, I was worried about small pieces. Small pieces mean choking hazards (what can I say, I still have never given my two year old popcorn) and things that get lost easily. I also didn't know if my wild and crazy toddler would sit still to even do any of the activities. I really should have given him more credit.

I decided to go ahead and participate and just see how things turned out. I am so glad I did. These things are amazing and despite my lack of creativity, I'm excited about doing another trade.

Our busy bag trade included the following activities for 2-3 year olds:
Fishing pole toy/game
Memory game (or shape matching)
Color wheel and number wheel match-up
Threading "snake"
Egg Carton color match with tongs
Popsicle color match
Play-doh and cookie cutters activity

Felt Fish Activity
My son's favorite by far (at least for now) is the fishing game. This is a great motor skills activity and you can incorporate color identification into the game as well. It is comprised of a dowel with a string attached to the end. On the end of the string is a magnet. Felt fish are included with the set, each having a paperclip attached that the magnet can grab. This set has two different sized fish which help focus the child's attention as the larger fish can only be attracted toward the mouth while the smaller fish are not much longer than the paperclip and can be captured at almost any point on the body.

Memory Game

This game is comprised of six pairs of matched felt "playing cards." The fronts of the cards have basic shapes. For younger children, the "cards" can be used for shape and color matching. As they get older, their memory can be tested through this classic game.

Color and Number Wheel

This activity is another one that works for several skill levels. The circle/wheel has two sides. One side has the six basic colors. Six clothespins are colored and labeled to match. While honing fine motor skills, the child attaches the coordinating color as they are on the wheel. The other side of the circle is divided into nine pieces. Each piece has a quantity of shapes to equal the numbers 0-9. Clothespins are labeled with number symbols and words on one side and with the appropriate number of dots on the other. This is a great game as toddlers get older and begin learning their numbers and counting.

Threading Ribbon Snake

This activity is a great one for fine motor skills, but can also help a child learn and recognize shapes and colors if coached while doing this activity. A button is sewn on the end of a piece of ribbon and the other end is sewn down. Felt shapes are then threaded onto the ribbon through a button hole on each shape.

Egg Carton Color Match

This is the Busy Bag I made for the exchange. Half of an egg carton is used for the activity. The bottom of each well is colored with one of the six basic colors. Pom poms are included to match the colors in the wells. The child does the activity by matching/identifying the pom pom colors and placing them in the appropriate wells. For fine motor skills, a pair of small plastic tongs is included to be used for placing the pom poms in the wells. My kiddo likes to collect all three pom poms of each color together before placing them in the well.

Popsicle Color Match

This activity is beyond cute. Popsicles are formed with felt for the edible part and popsicle sticks. The popsicle sticks are each marked with the appropriate color, both labeled with the color name and with a coordinating colored end. Again, honing those fine motor skills, the child places each colored felt piece on the coordinating popsicle stick to create the treats.

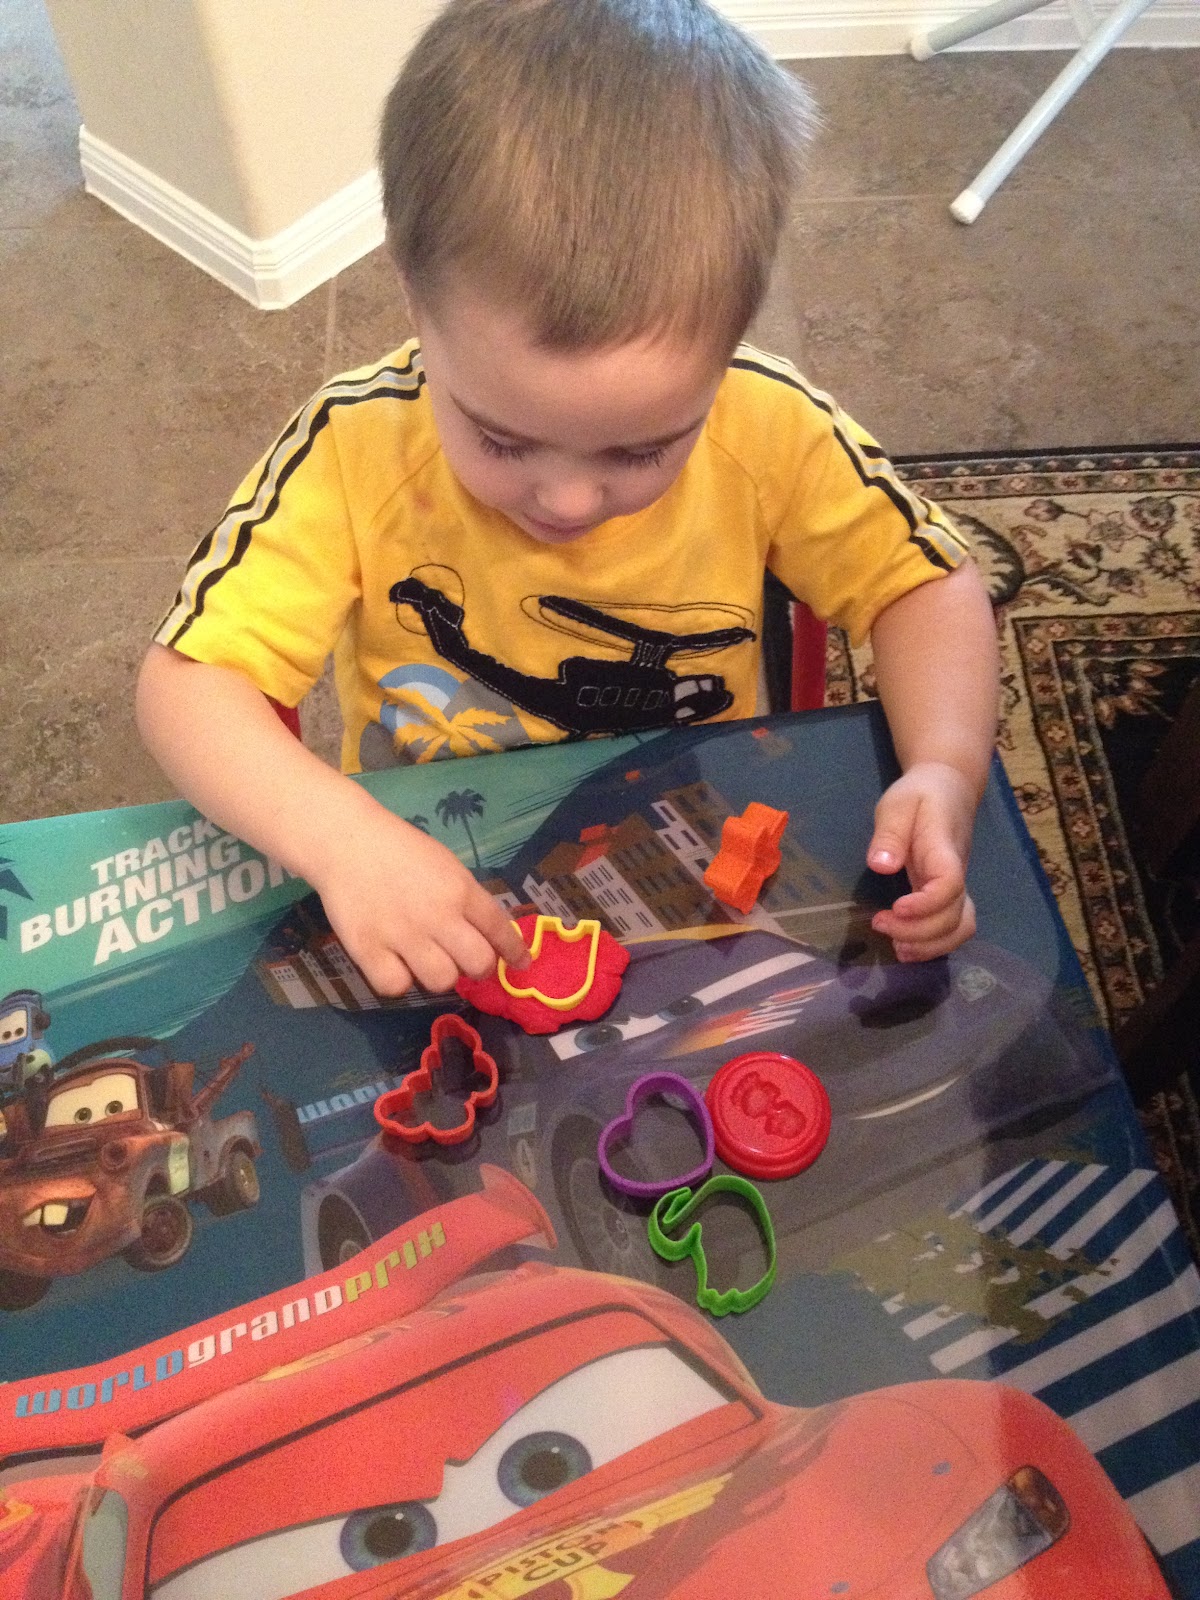
Play-doh and Shape Cutters

What kid doesn't like play-doh? This is a wonderful fine motor skill activity and just plain fun. Kids obviously have a lot of freedom to express their creativity with this activity, though it does require an appropriate setting. The cutters can also be used as a teaching tool for identifying shapes.

These are just the activities chosen by the moms in our busy bag group. There are tons of ideas out there and while some take a bit of craft skill to put together, others are super simple. These make great fun and learning activities for kiddos that can fill in a bit of down time on a rainy day or focus your child when out of the house (just stash one or two in your purse). Certainly, you can approach the use of these activities as you see fit. I personally keep them stashed away most of the time (especially since I have a baby crawling around that would love to get into the small pieces) and bring them out when the baby is napping or to calm and focus my toddler. By keeping them put up, there is added value and they become a special treat when my toddler can play with them. I am really excited to do another trade which we may do in another month or so. Our group has seven moms, but I've heard of groups being up to 30 moms. There are groups online that you can join as well. I highly recommend doing it. Though I was a skeptic at first, I see the wonderful value in it now and I look forward to exploring and learning with my kiddo more!

Monday, April 2, 2012

On the Ergo (Product Review)

On an almost daily basis, I'm telling people that I don't know how I would survive without my Ergo. And it's true. But I think it's primarily related to baby-wearing in general. My Ergo just makes it easier.

With two young children, baby-wearing is almost a must. The Ergo is a soft structured carrier (SSC) that allows for relatively quickly attaching the baby and getting on  your way. While not as quick of an in-and-out as a sling, it's speedy enough not to be cumbersome. The Ergo attaches around the waist with a heavy duty buckle and has an adjustable strap (an optional extender is available for those who need a longer strap). The main piece of the carrier covers the rump and back of the baby and shoulder straps attached to the top and side make the pack go on as though you were wearing a back pack. Babies can be worn in front, on the side, or on your back (although, I believe that very small infants with the insert should go on the front only). The shoulder straps are also adjustable for comfort and have an additional buckle that is secured at the chest or between the shoulder-blades depending on how the carrier is positioned.

I selected the Ergo Sport. This particular model has a slightly taller body thanks to the additional pocket where the hood is stored. As a result, it fits my large toddler a little bit better. Another benefit of the Ergo Sport is that it fits a wider range of adults that can carry a child. My husband at 6'3" who is built like a linebacker can wear it just as easily as I can at 5'5" and medium/small build.

My Ergo gets used just about anywhere. Because I also have a toddler, it's often easier to strap the baby to me in a carrier so I can keep up with the older child. Going to the store, I wear the baby in the Ergo and place the toddler in the shopping cart. At the mall, the toddler is in a stroller and the baby is in the Ergo. At the park, the baby is carried in the Ergo while the toddler runs around and plays. I take the carrier with me pretty much anywhere we go. At social gatherings, it is nice to have if the baby gets overwhelmed by all the activity, I can place him in the carrier and he can settle, shut down, nurse, and/or have a nap. Did I say nurse? Yep, that's right. I nurse in the Ergo too. Hands-free. And because of the structure, it's discreet too.

With the weight range up to 45 lbs., the Ergo may be the only carrier an individual needs. For very small babies the infant insert is necessary. Additional attachments/accessories include teething pads for the shoulder straps (which in my opinion are a necessity) and a storage pouch to carry small necessities like keys and a phone. As I mentioned earlier, a belt extender is also available.

I just about can't go anywhere without someone asking me about my Ergo. I commonly get questions about how comfortable it is, to which I always tell people it is very comfortable. I also get asked if the baby can face outward in it since the most widely recognized carriers allow for this. The Ergo does not, but that's ok and actually preferred. An outward facing baby cannot turn off stimulation if they get overwhelmed by everything going on. When facing their parent or caretaker in a carrier, a baby can turn toward them and block out everything going on around them. They also can sleep when facing inward as they can rest their head which is not something easily done when facing outward, another way they can't "shut down." Another benefit I like to tell people is that the design of the Ergo allows for optimal positioning. Because a baby carried in the Ergo is in a seated position, it places their weight on their rump as one would normally sit promoting proper hip positioning and if worn frequently causes no undue stress on the hips and spine as the child develops. Most commonly  people approach me to express concern for comfort because they've heard of or experienced carriers that did not work out because they were uncomfortable or they are interested in giving one as a gift to someone they know that is expecting (or themselves). I tend to give the general guidelines of recommending a higher quality carrier than you can find in big box stores and one that supports the weight of the child on the rump. I too, had a SSC that was uncomfortable and I just about gave up on wearing that type of carrier because of it. They don't have to be uncomfortable. If they are made properly for comfort of both the carrier and the baby, they are one of the best baby items to have in your arsenal.

I love my Ergo. It is my primary carrier these days (though I still do use my Moby and sling on occasion) because it is quick and easy and maximizes comfort for several hours' use at a time.